
After having a lot of these strategies for a while, I figured I might as well write it out for other people to reference if they'd like an idea for soloing certain PVE events or levels that can be troublesome when alone.
Please keep in mind while reading these guides that this is how I do my soloing. Some of my methods can be a bit slower than other strategies but I focus on preserving sparks as opposed to going through stuff quickly along with focusing on weapons that the average knight can obtain relatively easily. If your way goes faster and you can do it without sparks, great, write up your own guide (on here if you'd like!) to how you do it and what you use! I'll list it on this post if it is viable.
My guides are written in such a way that newbies will be able to get an idea for and why I am choosing the armor/weapon sets along with how specific monsters attack and act. For gear in guides, I recommend gear that anyone can get at any time, namely hall of heroes lines or recipe lines that are obtained from Basil. Any recipes that require PvP or gear that are not readily available will only be listed in the 'alternative' sections. If you wish to write a guide for this thread, please stick with this format as well!
- Guides Needed
- Operation Crimson Hammer
- Firestorm Citadel (I may write one up myself)
- March of the Tortodrones
- Grinchlin Assault (final battle)
Feel free to write any guide on any specific PvE level or event that you'd like though, more strategies is always great!
- Guides to Normal PvE Levels
- Soloing Fiend/Undead Arenas (By Sciger)
- Soloing Dreams and Nightmares (By Sciger)
- Guides to PvE Events
- Soloing Shroud of the Apocrea (By Sciger)
- Soloing Grinchlin Assalut (excluding final battle) (By Sciger)
Comments? Criticisms? Have a guide of your own? Feel the need to post a ridiculous GIF? Feel free to post!

Fiends. Almost anyone groans a little every time they're going down to a level that contains this monster family. Devilites. Gorgos. Greavers. They'll chuck old donuts, chomp on your little toe and smack you with their wings until you need to spark and buy a new keyboard after smashing your current one in rage.
I effectively forced myself to learn how to deal with them, specifically greavers when doing undead and fiend arenas during Shroud of the Apocrea and Black Kat prestige missions. It took some time along with trial and error but I have a strategy that works rather well with some proper timing of your attacks and, of course, some useful gear! This guide is written so you may successfully solo undead and fiend arenas and may not work as well in a group.
In general, you shouldn't need any unique variants to do well in the arenas. They certainly would be helpful, however!
Armor Recommendations
The first thing we have to take into account with our armor is the status of the arena. In general, you'll want armor that resists the status you'll be encountering because knowing devilites, gorgos and greavers (of which can show up in undead arenas too) you'll end up having a status problem of some sort. Of all the statuses, I actually found fire to be the least of my concerns. Shock, poison and even stun (STUN!?) were my primary nuisances, namely with the final fight of both kinds of arenas as that fight is made up of almost entirely greavers and generally results in at least one death. With the proper equipment and strategies, you can get away from this fight relatively unscathed, no less using your emergency revive or a spark.
Fire and Shock
A good set to take along for a fire or shock arena is the divine hood and divine mantle and for a shield, the crest of almire. The divine set resists elemental and shadow damage, which will leave you more vulnerable to normal damage, but cut down massively on how long you have fire or shock. Status is the main concern in these arenas. The crest of almire can take a few hits from the fiends without letting you down too quickly.
Poison
For poison arenas, I recommend the dread skelly mask and dread skelly suit for the shadow/normal defense and poison resistance. For a shield, also used the dread skelly shield . Poison doesn't just prevent you from healing. It also cuts both your attacking power and defensive resistance to a mere 1/3rd of normal. You really can't afford to take hits here if you want to survive an onslaught of greavers in the end.
Alternatives: Another option would be the snarbolax cap and snarbolax coat as both pieces have sword damage bonuses along with the proper defenses and resistances. It's effectively a direct upgrade from the dread skelly mask and suit, however, snarbolax pieces are only available from Shadow Lairs. As a bonus if you decide to craft a snarbolax set, some recommended unique variants to buy as a wolver cap or coat to craft up would be poison, freeze, normal or shadow resistances.
Freeze
For freeze arenas, I would recommend the dread skelly set for the shadow/normal defense and freeze resistance. For a shield, the dread skelly shield will further boost freeze resistance. If you have both dread skelly pieces, however, you can get away with using the crest of almire. You may still be able to attack when frozen but when you can't turn to face the greavers attacking you, it's a major problem. That and freezelock. Looking at you, lumbers.
Alternatives: One can also use the Gorgomega as a shield and/or the Black Kat set as both have freeze resistance while having shadow/normal defenses. The move speed decrease of the gorgomega is easily removed with a black kat piece or a battle sprite perk.
Stun
Unfortunately, there aren't any shadow/normal helm and armor combos that also have stun resistance. Fortunately, stun can be outlasted a little more easily than other statuses. Any normal/shadow armor sets will work here though the dread skelly shield has stun resistance along with shadow/normal defenses.
Alternatives: If you don't have a dread skelly shield, a crest of almire should work fine too. Another great alternative if you have it is the gorgomega, as it has stun resistance along with hefty shadow and normal defenses.
For more experienced players, you can probably get away with running one or both Black Kat or Chaos pieces if you can outrun your enemies and avoid being hit. I wouldn't recommend it for fire and shock arenas, however, as the damage/interrupts can quickly become a problem if you end up being hit.
Weapon Recommendations
First Weapon: Combuster/Glacius
Personally, I'm more of a fan of combuster as you can't really go wrong with more damage on a target! Unsurprisingly, these are the main weapon against both undeads and fiends as the charge is a force to be reckoned with against either monster family.
Alternatives: The voltedge, while it isn't readily available to some players due to the recipes being only available via PvP, is really helpful with its infliction of shock as it can and will interrupt greavers mid-attack.
Recommended Unique Variants: While unique variants aren't really required, a charge time reduction unique variant would be exceedingly helpful. Remember: if you heat your sword to level 10, it will get a charge time reduction: medium as a bonus, a unique variant will simply stack on it. Even a low variant would still be helpful!
Second Weapon: Divine Avenger
I've been a major fan of the sealed sword lines for years, even after the brandish buff some years ago. Yes, the brandish family lines do more damage, but the divine avenger's wide swing and high knockback is my primary key to defeating greavers, even above the flourish and snarble barb lines.
Alternatives: Personally, I wouldn't recommend any alternatives to the divine avenger simply due to my strategy. However, the final flourish and barbarous thorn blade are still quite good at taking out greavers, though not near as good as taking out massive groups of greavers. If you'd like to do well in the final battle of the arena, don't take this in place of the divine avenger.
Recommended Unique Variants: I believe this strategy will still work without it but I highly recommend having at least Attack Speed Increase: Low on your divine avenger so you can interrupt greavers more quickly. I personally use Attack Speed Increase: Medium but a higher variant is always better!
Third Weapon (optional!): Barbarous Thorn Blade or Final Flourish
One simply can't say no to the piercing damage of these lines against fiends! Quick and vicious, it'll take down fiends in a snap with a couple of hits. However, I can't say it's completely essential to finishing these arenas without using your emergency revive or sparking. It just can't handle groups of greavers well since they will try to go behind you and could flinchlock you.
Recommended Unique Variants: One can't say no to more attack speed increase so any from low to very high will be helpful.
Fourth Weapon (optional!): Arcana
I typically bring this along so I can deal with howlitzers from a safe distance and then snipe the head before it starts moving. Also useful for keeping greavers at bay from a distance if you have a status to wait out. That's about all it's for here.
Recommended Unique Variants: While Arcana's charge is pretty useful, it isn't more useful than being able to fire off shots quicker. Attack speed increase of any kind would be helpful.
Battle Sprite
Maskeraith
I highly recommend the maskeraith in fiend/undead arenas for two reasons: the cloak and the haze. The cloak is amazing if you're in a pickle and need some time to wait out a status (shielding while cloaked and shocked won't reveal you and will prevent the shock spasm from doing damage) and/or just need to get your bearings and another angle to attack again. The haze is key for the final part of the arena, which will be covered in its own section later.
Alternatives: The drakon is just as helpful in the final part of the arena with its firestorm ability but doesn't have the useful cloak to save yourself in a pinch. The barrier can be somewhat helpful against greavers though but I just prefer the maskeraith more.
Recommended pet perk: Sword Attack Speed Increase
Alternatives: Move Speed Increase, Status resistance of the arena (if you're lacking resistance to the status due to not having an armor piece for it or are using black kat/chaos armor pieces) or Healthy Boost
The Strategy
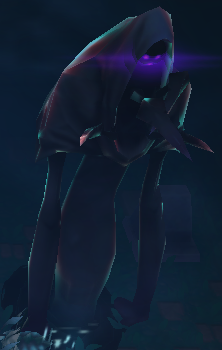
Greavers
One of the more common enemies in fiend arenas are greavers, though they frequently show up in undead arenas as well, hence why that is listed here too. Greavers can be downright brutal to players if you aren't prepared and don't fight back against them. One of the biggest mistakes I see are people who try to shield until they have a chance to retaliate or just flat run away. If you have more than a couple greavers bothering you, they will break your shield and start dealing a lot of damage. You can't outrun them unless you have a decent amount of move speed increase and even then, they very likely will still inflict a status.
Dealing with Greavers
The recommended weapons are key here. Provided you have brought a combuster/glacius and divine avenger, you can easily keep the greavers at bay simply by timing your divine avenger swings so as many of them are closest to you as they attack. Greavers will swoop in to attack you, going behind you if you aren't moving away from them. If you can time it just right so they are right in front of, or even to the side, of you, you can hit them and interrupt their attack. (Greavers + Corner + Divine Avenger = Dead Greavers) Greavers can be flinched very easily with just about any weapon but the divine avenger's wide swing hits them during their attack. Greavers don't have much HP either so three hits will do them in without a silkwing healing them. (Greavers + Corner + Divine Avenger + Silkwings = Dead Greaver and Silkwings)
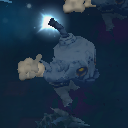
Gorgos
Gorgos are also a frequent in fiend arenas, showing up often enough in undead arenas too. In Tier 3, they will chomp in your general direction three times before slowly floating away from you to keep its distance. Their change in direction is rather spazmatic so nailing them with a brandish charge or shooting them can be rather annoying as they float the opposite direction of where your shot is aimed.
Dealing with Gorgos
Gorgos are a pain, easily my least favorite fiend, even above greavers. The best you can do is, when they aren't attacking, get as close as you can and deal as much damage as you can with your combuster/glacius or divine avenger. If you can predict what direction they're going to go, try charging your combuster/glacius, as that can sometimes take them out completely if they ride the entire charge. As soon as you see they are attacking, back up directly away from them as much as you can, only shielding if they get too close. Three chomps in succession on a fully charged shield will break it and deal you damage. If there are lots of gorgos, kite around them, keeping your distance while charging your combuster/glacius and releasing it when they aren't too close to chomp you. It's a bit slow but gets the job done relatively safely.
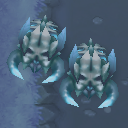
Devilites
I used to hate these lil boogers with a passion. Nowadays, they're still annoying but not near as scary as they used to be. It also helped when they were nerfed to not aim as well. Devilites will attack seemingly at random with very quick throws of random (but painful!) objects. They also have a tendency to dash around, especially when shot at.
Dealing with Devilites
Kite around them at a decent distance away from them but not so far that you can't dash in and attack at the right time. Right after a devilite has thrown an object at you, move in and attack. I personally like to either have a combuster/glacius charged so I can move in and pretty much OHKO them. However, another good strategy is to have yourself shielded, then move in quickly once they attack and double swing with your divine avenger or final flourish/barbarous thorn blade. That renders them either dead or at very little health so one more hit will finish them. Keep in mind that devilites are also easily flinched, but not as easily as greavers, so a sword swing will interrupt them if you're quick and they're going to attack again. If you are dealing with a group of devilites, try to time it so as many of them have just attacked as possible and move in to take out a few of them or unleash a brandish charge and let the status do its job. If you're lucky, some will 'dodge' into the charge and take lots of damage!
Surviving The Third Arena Stage
Easily the hardest part of both fiend and undead arenas is the very final battle in the third arena. This takes a little bit of doing to set you up for the best possible scenario for the final battle but it's worth not dying or at least, not sparking!
First Wave
The first wave of enemies to spawn will be greavers along with another monster, usually devilites, gorgos, zombies or kats depending on your arena. Killing all the greavers will cause two lumbers and two silkwings to spawn. Killing the other monster that spawned with the greavers will cause four howlitzers (or if you're unlucky, polyps) to spawn, one in each corner of the arena. I recommend killing the greavers first (unless some aren't aggroed on you) and then killing the other monster family.
2nd Wave (minus one silkwing)
This step is important: when the four howlitzers spawn, kill all but one of the howlitzers. Leave the lumbers and silkwings alone if you can as we will need at least one of these alive so the next step is easier. Make sure your dash is ready to be used. Get the attention of the final howlitzer remaining and stand in the corner of the arena that it is in. Dash so the howlitzer loses your aggro and is now facing outside of the main area of the arena. (Don't kill me yet, I'm too awesome to die!) Then, go about killing the lumbers and silkwings left until one of them is left alive. Try to shield bump the remaining silkwing or carefully lure/shield bump the lumber into a corner but not the corner the howlitzer is facing. Then, kill the remaining silkwing or lumber.
Third Wave (leave the one facing away from the arena alive though!)
A wave of two howlizers on each edge of the arena will now spawn for a total of 8 howlitzers. If you are safely in the corner, none of them will see you. From there, using brandish charges, go along the edges of the arena and take them out two at a time. One should be killed almost instantly if hit by the swing and charge. Back up and try to move yourself around in circles so the howlizter head can't turn fast enough to hit you. The second howlitzer on that side should either be dead and ready to attack or be low enough health that one hit will do it. Take out each howlitzer until the howlitzer facing away from the arena is the only one left. Then, you can finally kill it!
Fourth Wave
After the howlitzer faced away from the arena is dead, four lumbers will spawn in the center. Using either brandish charges or divine avenger charges, try to leave one of them alive. Lure him into the lower right corner. I specifically use this corner as it spawns one of the silkwing healers. Kill the lumber then charge up your brandish with your back in the corner of the arena. The final wave will then spawn. Release your charge to take out the silkwing healer right in front of you and back up into the corner again. Use your 3rd sprite skill (you should have maskeraith or drakon with you) and start swinging your divine avenger while backing up into your corner again between attacks. The reason for the sprite skill is primarily to interrupt the greavers' attacks. Still, try to time your attacks so you interrupt the most greavers at once. As you swing and as the firestorm/haze damage goes away, you will quickly overwhelm the remaining silkwing and take down a lot of enemies at once with the wide swing. Stay in your corner until most if not all greavers are down and pick off the remaining monster in the upper left corner.
Ta-da, arena done and loot is had! Woohoo!